Saturday, January 14, 2012

Day 13: Well, kind of... Oatmeal Creme Brulee


    Yesterday was pretty unproductive as far as getting out of bed even goes... so making a recipe was not something that was going to happen. Therefore, I have decided to provide 2 days worth of recipes today (The 2nd to be posted this evening). While I'm still quite miserable and didn't realize that strep throat was so icky, I needed to get out of bed a little today and tend to my family. 

    I keep giving my husband the, "If something ever happens to me, promise to..." lecture. To conclude that statement are things like, "empty the lint trap in the dryer between each load" or "not eat out EVERY night" or "remember to buy baby food" or even "give the kids baths." While I feel like (READ: "I AM") a nag, these are the little things that make me neurotic on a daily basis, just being a mommy. The sort of things that my hubby doesn't have to think about- until I'm down for the count for 3 days.
    Of course, while we both know that I am not on my death-bed, his response was, "Promise me if something happens TO YOU, that you send me a buxom redhead who can do all this stuff for me?" Yeah... thanks Justin... I told him he could send me a guy with a nice six pack who puts his clothes in a laundry basket instead of on the floor 6 feet away. I thought that was fair.

So the family "brunch" recipe for this morning was an Oatmeal Creme Brulee. Keep in mind that this was a recipe from the internet, adapted to gluten free and a more golden top. The other change I would make next time is to add a little more cinnamon, but that extra is not included in the recipe below.


OATMEAL CREME BRULEE
GF, CoF, NF, SF (Could easily be adapted for other allergens- the original recipe said you could use an egg substitute, and I think this would work with PLAIN almond or soy milk too)

Ingredients:
    2 1/4 C GF Oats (I used Bob's Red Mill, but prefer GF Oat Company)
    1/3 Cup sugar
    1/4 tsp Salt (optional)
    3 1/3 Cup milk
    2 Eggs 
    2 teaspoons Vanilla extract
    1 TBS Cinnamon 
    2 TBS Brown sugar 


Preheat oven to 350 degrees. Spray 8X8 dish with cooking spray.

Combine milk, eggs and vanilla in large bowl. 

Add oats, sugar,cinnamon, and salt; mix well.

Pour into baking dish, spread oats evenly.

Bake about 45 minutes or until center is not runny. Edges should pull away from dish slightly.

Sprinkle brown sugar evenly over the top. 
NOW YOU HAVE 2 OPTIONS- 
1. Return to oven and bake till sugar is melted.  
Or 2- Use a hand-held propane torch to lightly burn the sugar on top (this is the option I chose)

Allow to cool slightly, and cut


Isaac was a HUGE fan- he loves oatmeal and cinnamon. He had two helpings and topped it off with some baby carrots. The kiddo had been eating like a horse, we're pretty sure it's another growth spurt. Add that to my mommy list- go through the kids clothes and figure out what they've outgrown!


Isaac enjoying his oatmeal
(Note the red-raw nose from his virus too!)
While I made this, I made Henri some homemade apple sauce, which he happily slurped up, while looking longingly at Isaac's plate.


Let me know your thoughts!

Naturally,
Raych

Thursday, January 12, 2012

Day 12: So glad they're soft... Poppy-Seed Popovers

Today’s recipe needed to be something quick and easy to swallow… literally. I have strep throat, which would, I guess, be a valid reason for the lack of quality posting last night. While I feel like junk, I have discovered that ibuprofen gives me just a couple hours of sanity (before the rock swallowing feeling and the fever return). Thankfully, mini-man went to bed easily tonight, and little-man is well on his way and reading with his Daddy. I have spent the majority of the last couple of days in bed, and I am SO thankful that my husband is a GREAT father.

I remember, in my pre-GF days, making popovers often- to serve with whatever meal we were eating that evening or to spread jam on. I had not ever considered being able to make them again. When I found this recipe (below) I was pleasantly surprised by how easy it looked; and by the prospect that in only 30-40 minutes I could be enjoying some of my old favorites.

Today’s recipe was stolen from the Living Without Magazine website…


 1 cup gluten-free all-purpose flour blend of choice (I used ½ C Brown rice, ¼ C Tapioca Starch and ¼ C Potato Starch)
½ teaspoon xanthan gum
½ teaspoon kosher salt
1 tablespoon unsalted butter or dairy-free alternative, melted and cooled
2 extra-large eggs, lightly beaten, room temperature
1 cup milk of choice (low-fat is fine, nonfat is not), room temperature
1 tablespoon poppy seeds

1. Preheat oven to 400°F. Generously grease a 6-cup popover pan (or a regular muffin tin with deep wells, if you don’t have a popover pan) and set aside.

2. In a large bowl, whisk together the flour blend, xanthan gum and salt. Add butter, eggs and milk, whisking well after each addition until the batter is smooth. Add poppy seeds, whisking to combine. The batter will be thin.

3. Fill each well in the pan just under half full. Place the pan in the center of preheated oven and bake for a total of 30 minutes. After the first 20 minutes, pierce the top of each popover with a sharp knife to allow steam to escape. This helps the popovers maintain their puffiness.

 Recipe adapted from Gluten-Free on a Shoestring by Nicole Hunn. Reprinted by arrangement with Da Capo Lifelong, a member of the Perseus Books Group. Copyright © 2011.

 Well, Justin is a milk-o-holic… so we were out of milk… even though I was almost done making the mix. Instead I used rice milk, which does contain fat, but obviously not enough to make these popovers really pop. Mine sort of “popped-under”. I followed all of the instructions to the mark, the rice milk being the exception, and while these did pop a little and tasted just like their gluten containing counterparts, they did not get that nice airy pop to them. Needless to say, Isaac and I sat in bed reading a little and munching on popovers tonight.

 Hopefully by tomorrow I’m feeling a bit better (especially since I’m not allowed to return to work until after the weekend). Maybe I’ll be able to make an actual meal again by then?!

 Naturally,
 Raych

Wednesday, January 11, 2012

Day 11: A GF Review

In a way I am breaking my resolution today... except that I am still posting despite be horribly lousy feeling tonight. Pretty sore my fever broke, but I feel like I'm swallowing marbles each time I swallow, I did not make my family dinner last night, instead we went to Azteca restaurant and enjoyed some yummy food off of their gluten free friendly menu, Quite obviously, I also did not cook tonight (bad mommy). I decided that I would instead post a brief review of our dinner experiences last night. There is a reason this is one of our family's favorite eats... it's reasonably priced, they hve ridiculously speedy service (to the point that I wonder if they just know us in dvance), and all items on their menu that are GF are noted as such. Mommy likes. Isaac is a fa n of tacos... and loves the fresh tortilla chips. Justin says it is some of the best Mexican good he's had on the east coast. Henri just made funny faces as I snuck him some refried beans. Overall, a gret experience had by all. I am posting today's mini blog from our nook, so there won't be any imGes this time around... but I wouldn't want to mke you jealous anyway. Naturally, Raych

Tuesday, January 10, 2012

Day 10: 'Cause I'm hungry.. That Swai!

I wrote the title for today's blog and my husband looked at me cross-eyed, but smiled. It was that smile of, "I don't get it... but I'm going to pretend I do...?" Meanwhile, I thought I was pretty clever. Guess not :)

Swai is a remarkably light tasting white fish, and remarkably cheap! I bought over 1 lb for only about $4.00 at Price Chopper the other day! We only needed 1/2 lb to fee the three of us that would be eating it; so I kept the other 1/2 lb frozen. When I told my husband that, "Swai was the poor man's catfish"... he responded with, "Isn't catfish the poor man's catfish?"

That being said, we were pleasently surpised. I'm a picky eater when it comes to fish. I'll try any food once- as I flashback to Scungili Salad, toasted Cricket, or the nearly gag-worthy raw fresh water clam (nothing like cherrystone clams or oysters folks)- and most of the time I'd even venture a second try. I even LOVE sushi and sashimi. There is just something about preparing fish at home that leaves me going to the basic stand-by choices: tilapia, salmon and haddock... or canned tuna, but that's just not the same.

The best fish dish I've EVER had was at Disney's Epcot, the Coral Reef Restaurant- it was some Gulf of Mexico variety (sans petro-oil). That left me standing at the fish counter this week staring at the varieties, swearing that I would try something new. Looking at the prices, I decided that Swai was our budget (READ: Daycare cost) friendly option. Of course, it's coating (below) was nothing extraordinarily special, and Justin woudl have probably preferred if I hav=d made fish and chips0 because the man loves anything fried. This would be my "oven fried" attempt, and it wasn't bad!

As for the side dishes, I kept it simple. Quinoa is a frequent flier in my house, as is asparagus. As far as I'm concerned, they are my healthy sides when I'm in a pinch. Quinoa is a super-food, and since going gluten free I've discovered its amazing versatility. I'm sure iIll post a "sweet" version later as well. The asparagus was simply cooked tonight, but I also plan on sharing my sister's quick and crunch y oven baked GF asparagus recipe soon as well, as I use that one most of the time now.

Well, here it goes...


Corn Coated baked Swai (w/ Onion Quinoa and sauteed Asparagus)
Makes 6 servings, or 4 "hungry people" servings :)
For the fish:1lb of Swai
Olive Oil
Minced Garlic
Corn Meal
Salt & Pepper

Coat the fish with olive oil, brush with minced garlic and drop into finely ground corn meal.
You may want to season with salt and pepper as well.
Bake in the oven for 10-12 minutes (depending upon thickness of the piece)

For the Quinoa:
1.5 Cups of Quinoa
1/2 cup diced onion
Olive Oil
1 TBS Minced Garlic
2 TBS Chopped Fresh Parsley
3 cups of chicken or veggie broth- we decided on chicken for this one

Saute the onions and garlic in the olive oil.
Add the broth and the quinoa
Cover and cooke for about 10 more minutes or until liquid is absorbed and quinoa is tender.
Add and stir in the parsley

As far as the asparagus goes, I just cooked it in a lightly coated (with olive oil) pan with some salt and pepper.

Let me know your thoughts, or if you have any amazing fish recipes (or stories) you'd liek to share. Maybe I'll learn something and expand my bland old sea-based recipe repertoire!

Naturally,
Raych

Monday, January 9, 2012

Day 9: Chipotle Pulled Pork Tacos

No ta very long blog tonight, nor a very elaborate recipe, but I thought I'd share none-the-less :)

The recipe included in today's blog is actually quite a simple one. I use it often when I know I won't have a lot of time to cook when I get home from work. Isaac and Justin are both huge fans of taco nights- and this taco recipe has become a family favorite in a very short amount of time.

How much "pull" your pulled pork has is highly dependent on how long and slow you cook it in the crock pot. This particular time around, I had to do a speed version, so I had to cut the pork into thin slices, but it was still just as delicious.
I would have added a picture of the actual tacos, but my camera battery
died while my hubby and son were scarfing down their food!
Chipotle Pork Tacos
GF,DF/CF,NF, SF (Please be conscious of brands, some spice brands are not GF, NF or SF)

To make:
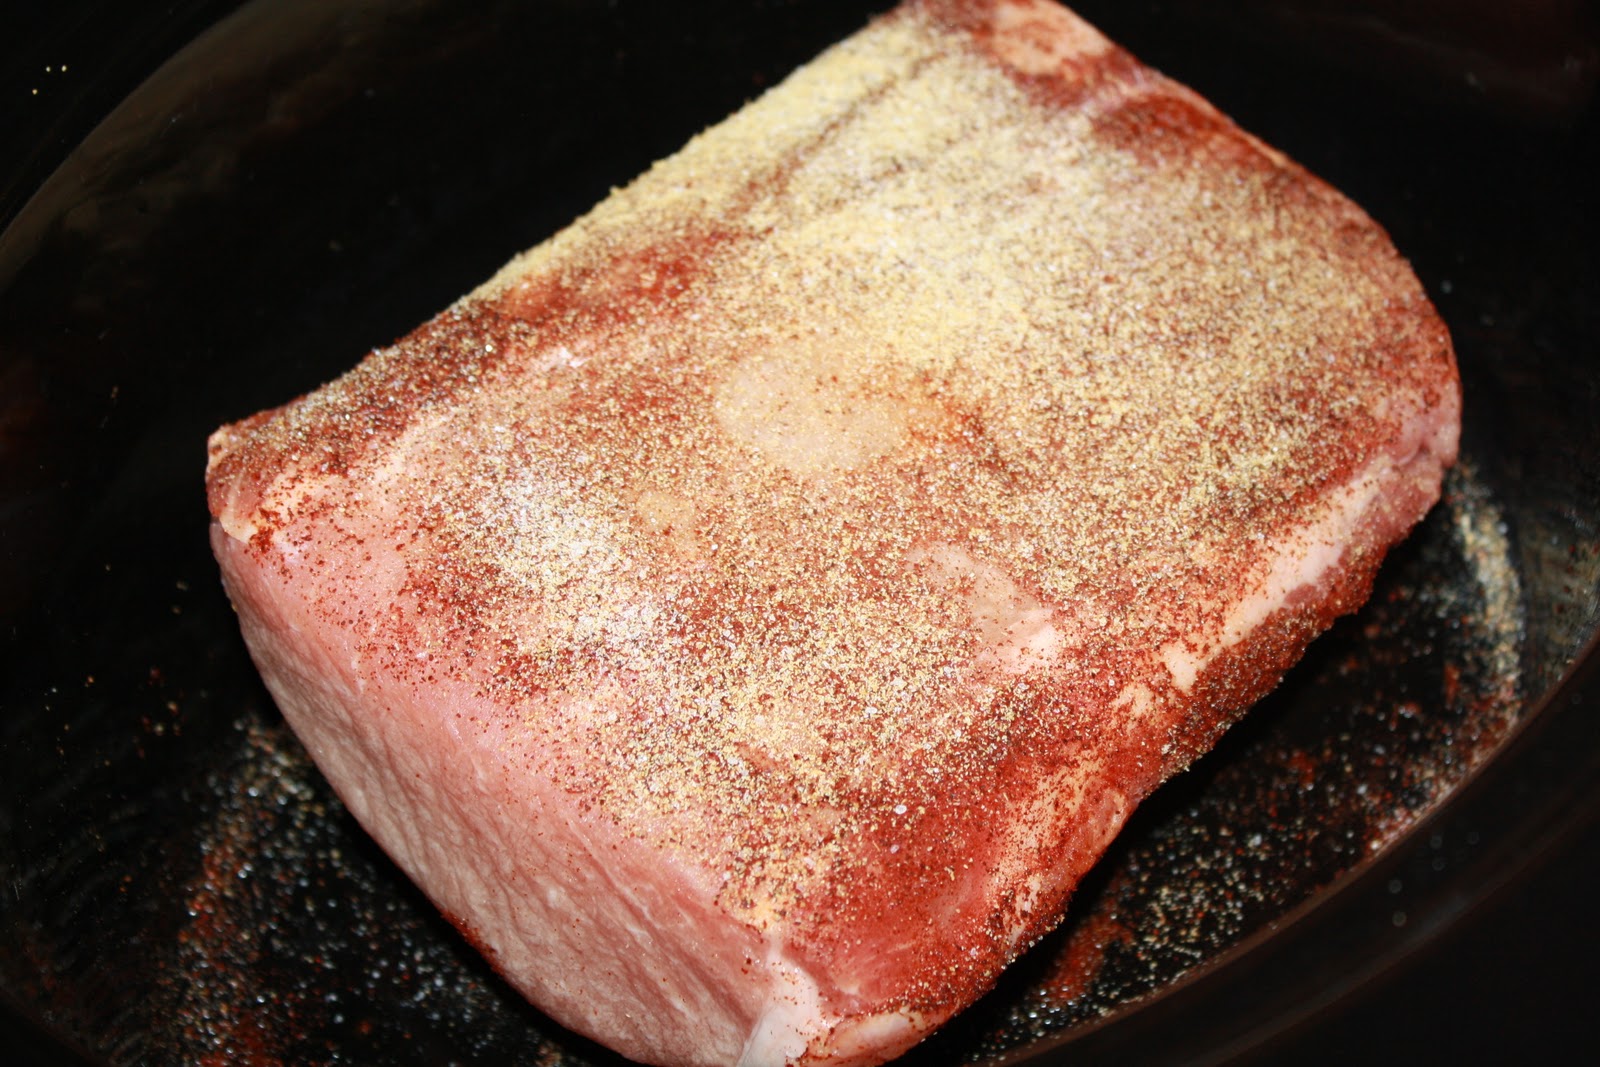
Prepare the outside of a pork loin or roast (based on your preference, but loins cook much faster, for those mommies in a rush).

You will need Chipotle Pepper spice (McCormick), Garlic Powder (or fresh minced garlic), salt, pepper and a very small pinch of cayenne if you like spice. If you are not a fan of hot and spicy, but just want the smokey flavor of the chipotle, then skip the cayenne.

Rub the entire outside of the pork with the spices, liberally.

Place in a crock pot


 Add 1/4 cup to the bottom of the pot. DO NOT POUR OVER THE TOP OF YOUR MEAT, YOU'LL LOSE THE SPICES!

Cook in crock pot all day until pork reaches a temp of 145 degrees or higher

We top our tacos with avocado, tomato, lettuce, shredded cheese and a semi-homemade chipotle ranch.

To make the ranch, combine 1/4 cup of ranch dressing with 1 1/2 tsp of chipotle seasoning.


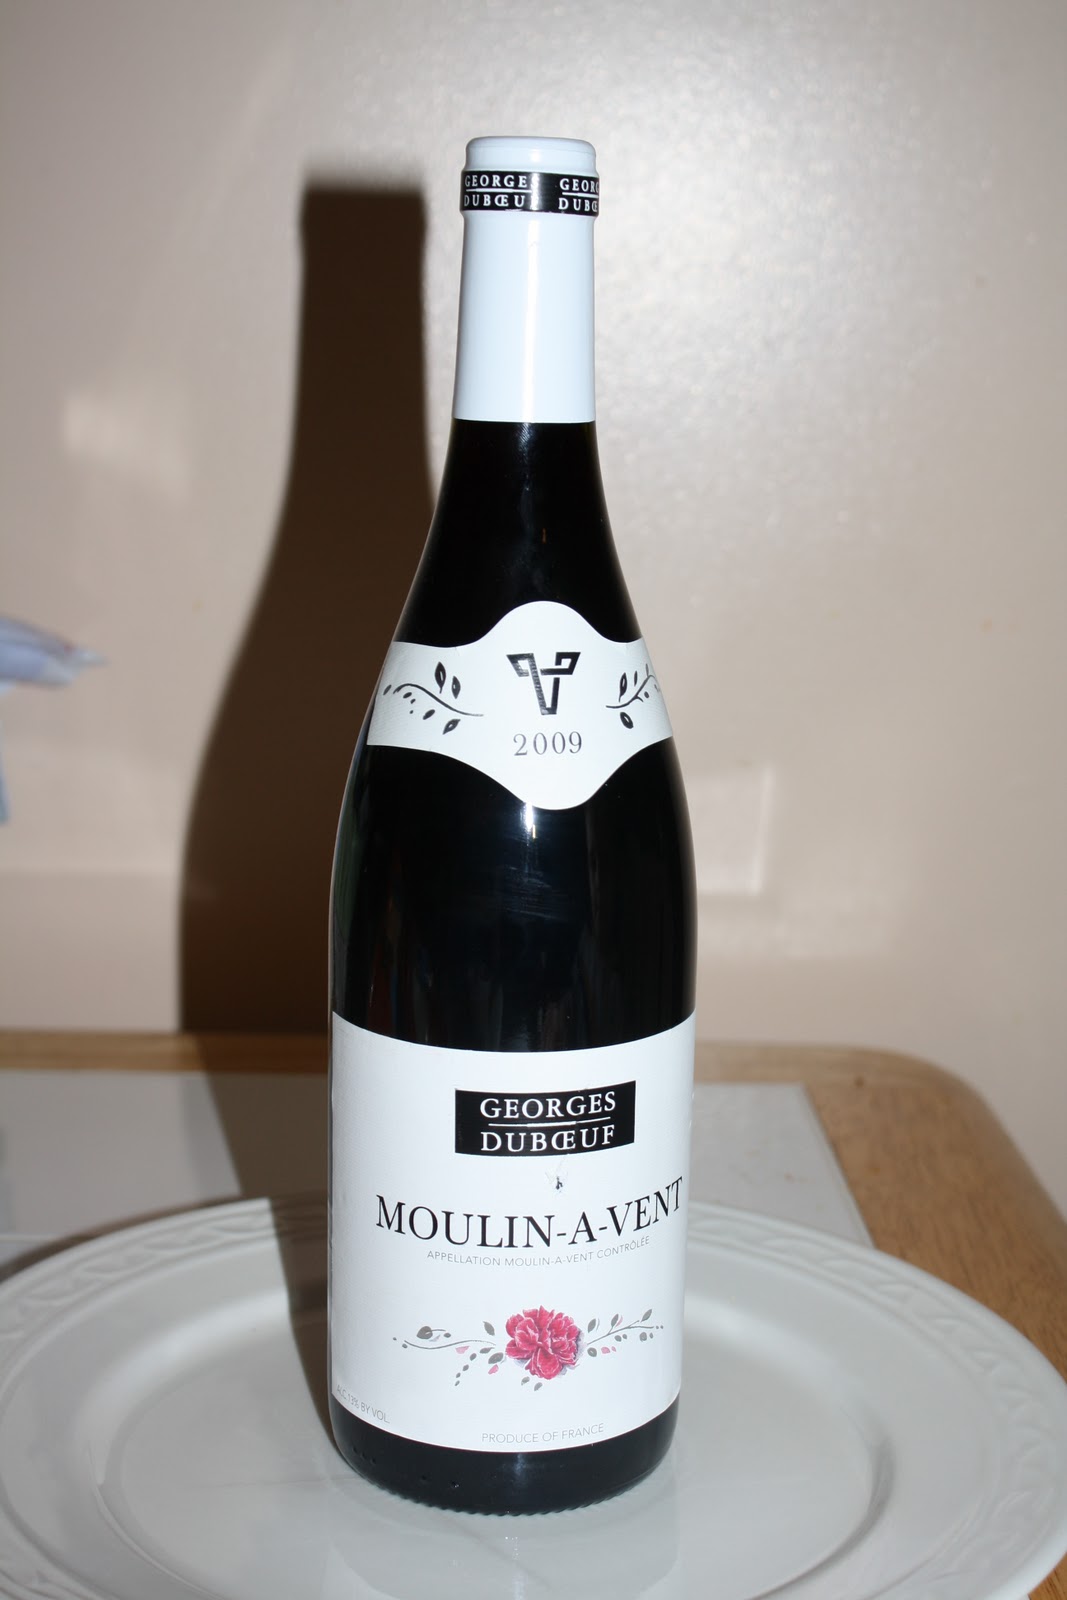
The wine selection for the evening is another Georges DuBoef cheap table wine.. Moulin-A-Vent. This wine was VERY mild in taste... almost boring.


Let me know your thoughts! More delicious recipes coming your way tomorrow!

Naturally,

Raych

Saturday, January 7, 2012

Day 8: Homemade Onion Soup

With all of the new recipes and new treats come only a couple of problems:  One- we can’t figure out how we can expand our garden this summer, both because we lack the sunlit space (though we have about 7-ish acres, we live in the woods) and because we still need to have no time to maintain it with the two little kiddos. Two- my husband is now daydreaming up all of the things he wants me to make for him; and they can be quite elaborate. AND, three- I was posed the question today, “if we had a lot of money… would you quit your job and just cook good food all the time… ‘cause I like all of this fresh food and new stuff?” That’s right, has my husband become delirious with too much home-cooked fresh food in his belly? Ha! I teach high school and own a start-up business… yeeeah…

The recipe below was an extension of last night’s recipe. By extension, I mean that this was the bulk of our meal, but it was overshadowed by dessert. This soup was delicious and fresh. It will definitely be kept in the files for a re-do when we have onions in the garden this summer/fall.

French Onion Soup
Serves 4
GF, CoF, EF, SF, NF… use a cheese alternative if you want this to be DF/CF or Vegan

INGREDIENTS:
2 large yellow onions; peeled and thinly sliced.

1 TBS Olive oil

1/4 teaspoon of sugar
1 tsp, minced garlic

4 cups of vegetable stock (Kitchen Basics brand, as usual).  Most recipes call for beef stock, but I decided to make this vegetarian style

Pinch of dry thyme
¼ tsp Salt

A few turns of fresh pepper
4 slices of toasted GF Bread- I used my own “Crazy Bread” from Friday’s recipe

4 slices of fresh smoked Gouda
About ¾ cup of grated fresh parmesan

Cooking:
Toast slices of the bread in the oven at 350 degrees for  12 minutes, flipping once half way through. I cut the bread to about 1 in thickness.

In a large saucepan, sauté the onions in the olive oil on medium high heat until well browned, but not burned, about 8 minutes. Add the sugar to help with the caramelizing.
Add garlic and sauté for 1 minute.

Add the stock and thyme. Cover and simmer for about 15 minutes.
Ladle about 1-1.5 cups of onion soup in oven-safe soup bowls.

Place a piece of the toast on top
Top the “crouton” with the two cheeses (First the smoked gouda, then sprinkle with fresh parmesan)

Bake in the oven at 350 degrees F until the cheese bubbles and slightly browns.


The smoked Gouda added the flavor that the missing beef broth made the soup lack. I would definitely use smoked Gouda in the future, no matter what type of broth. I usually use provolone cheese for my melted topping, but my Price Chopper bagger seems to have missed putting that item in my cart. No big deal, we are a cheese loving house, so there are always alternatives, and this one worked out beautifully.

Image courtesy of drinkinsider.com
Justin’s wine recommendation for this meal (since I am still nursing and wine is limited in my diet)- Beaujolais Nouveau. Probably because we had a bottle open already, but this really is the best cheap red table wine under $10. Unfortunately, I’m pretty sure that if you didn’t buy it yet, it won’t be available again until Thanksgiving 2012. It’s only available from November through New Years in most locations. We buy a few bottles to last us the year, between our other wine samplings.
If you try this recipe out, let me know your thoughts (or additions)!
Naturally,
Raych

Day 7: Kabocha Squash Cupcakes


What a wonderful day. Not only was it unseasonable warm and beautiful outside today, but I was able to spend some time at one of the stores that carries our product line. It’s nice to meet directly with customers to show what we had to offer. In the process we made a few new supporters and networking contacts. We were even lucky enough to meet Beth Hillson, author of a delicious cookbook and food editor for Living Without magazine. I can assure you that I will be trying out many of her recipes- her carrot cake was delicious and she had a great take on quinoa salad!
I came home to my very hungry boys and decided to make them something special for a dessert tonight.
Tonight was a double “new” recipe night, so it was a tough decision which one I would be blogging about. We had homemade onion soup for dinner (using the bread made from last night’s recipe), which was tasty, but all of us finished tonight off with a new cupcake recipe that took our breath away! Therefore, I’m starting with the best part of the night. The onion soup will be tomorrow’s blog J
Kabocha, pronounced as it looks- “Ca- Bo- CHA”, is one of the winter squash varieties. (According to the internet… it is also known as a Ebisu, Delica, Hoka, Hokkaido, or Japanese Pumpkin). I had never cooked with it before, but in my quest to eat more naturally I also wanted to try to use more veggies and fruits that are “in season”. Originally I was intending this little sweet winter squash for a side dish, but then I found a recipe online (via William's Sonoma) for kabocha cupcakes. I adapted the recipe- meaning I made it gluten free, reduced the sugar, added some other spices and adapted the liquid ingredients to meet the needs of the GF flours. So here it is...


Kabocha Squash Cupcakes
GF, NF, Cof, and SF  (Contains EGGS and DAIRY)
Makes 12 Cupcakes
Ingredients:
1 Kabocha Squash (you will need 1 cup of puree for recipe)
This is a Kabocha Pumpkin/Squash
Image admittedly stolen from the internet,
from a source I can not longer find :)
½ Cup Water (for baking squash)
¼ Cup Potato Starch
¾ Cup Tapioca Starch/Flour
½ Cup Brown Rice
2 TBS Canola Oil
¾ Cups White Sugar
2 Eggs
½ tsp Vanilla
1 tsp Baking Soda
½ tsp Cinnamon
¼ tsp Cloves
1/4 tsp ginger
¼ tsp Salt
¼ Cup Milk

To Make the Kabocha Squash Puree:
Cut one Kabocha squash in half (top to bottom), DO NOT remove seeds. Place face down into bake ware (I used my corning ware) and pour in ½ cup of water. Bake uncovered at 400 degrees for approximately 1 hour, or until squash becomes soft. 
Allow baked squash to cool (I put it into a Ziploc and put in the fridge overnight)
Scoop out the seeds, careful not to remove any of the soft flesh.
Scoop out the flesh of the squash to puree. The skin IS edible, but not good for this particular recipe.
Puree the squash in a food processor. You could probably do this by hand because the squash is VERY velvety and tender.
You will only need 1 cup of the puree, so set that aside. You do not need to use the remainder of the squash puree right away, and I’ve heard that it freezes well. But trust me, this recipe is SO good, I would just double the recipe in the future until all the squash was used up.

Making the Cupcakes:
Pre-heat oven to 350 degrees
Filling the cups.
Combine the squash and ALL of the dry ingredients in a bowl.
Add in the eggs.
Wisk in the vanilla, milk and oil.
Combine until smooth.
Fill each cupcake paper about ½-3/4 full. Keep in mind that this made exactly 12 regular size cupcakes for me.
All baked up and ready for frosting
Bake for 18-20 minutes or until firm and golden. Mine took just about 20 minutes on the middle rack, but I could see where if it was placed any lower you would be toward the 18 minute side of that scale.


Once they cooked I topped them with some homemade cream cheese frosting. I don’t really measure when I make frosting. I just used ½ of a bar of cream cheese, a little fine sugar, and a splash of vanilla. I know, not very accurate measurements, but it came out perfect for these cupcakes!
They come out very moist and I’m pretty sure no one would know they were gluten free! DELICIOUS!!!
I will definitely be using kabocha squash for other recipes in the future; it was a very exciting find. Let me know your thoughts! Enjoy!

Naturally,
Raych